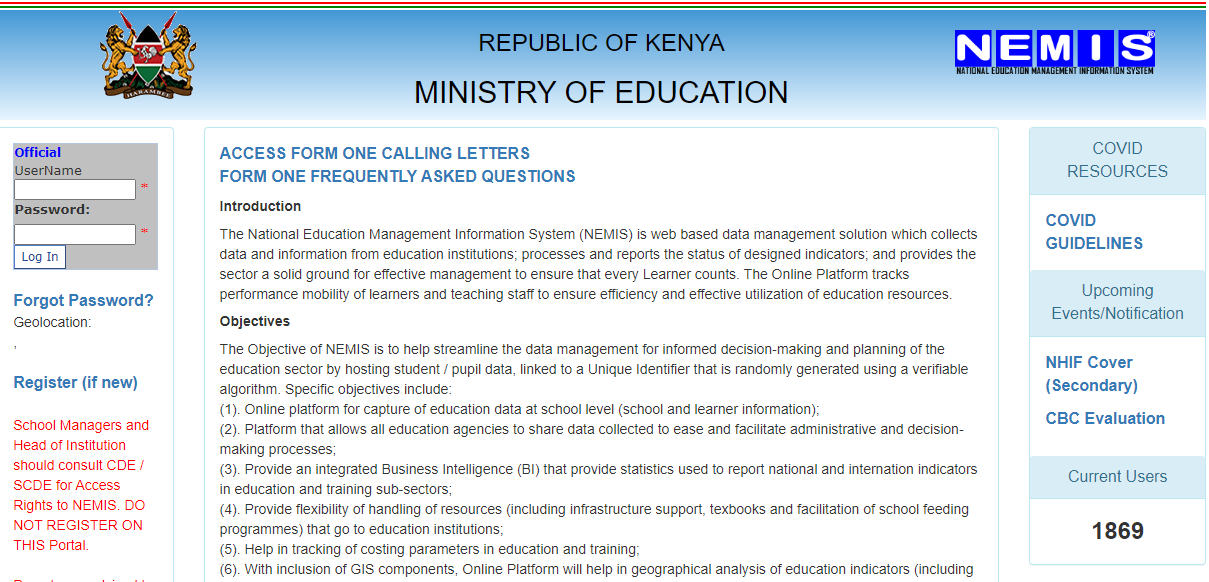
The National Education Management Information System (NEMIS) is an online platform designed to manage and automate education data and related administrative tasks. Its primary objective is to assist the Ministry of Education in gathering precise and up-to-date information on learners and educational institutions.
How To Reverse Mpesa Wrong Transaction
Nemis Portal Login
To log in to Nemis Portal use
Nemis Portal Objectives
The objective of NEMIS (National Education Management Information System) is to help streamline data management for informed decision-making and planning in the education sector. It does this by hosting student/pupil data, linked to a unique identifier that is randomly generated using a verifiable algorithm. The specific objectives of NEMIS include:
1. Providing an online platform for capturing education data at the school level, including school and learner information.
2. Creating a platform that allows all education agencies to share data collected to ease and facilitate administrative and decision-making processes.
3. Providing an integrated Business Intelligence (BI) system that provides statistics used to report national and international indicators in education and training sub-sectors.
4. Providing flexibility in the handling of resources, including infrastructure support, textbooks, and facilitation of school feeding programs, that go to education institutions.
5. Helping in tracking costing parameters in education and training.
6. Including GIS (Geographic Information System) components to help in the geographical analysis of education indicators, including the production of various maps that are useful in the education sector.
Applying for Jobs in Canada through Canada Job Bank from Kenya
NEMIS Portal registration procedure
To register on the NEMIS portal, please follow the steps below:
1. Open your browser and go to the NEMIS portal by typing in http://nemis.education.go.ke/ .
2. Click on the “Register (if new)” button to initiate the registration process.
3. Fill in your personal information, including your organization, username, gender, email, department, and category.
4. Ensure all text boxes are filled correctly and click on the “Save” button to save your details.
5. You’ll receive a notification confirming successful registration if the process was a success.
How to register students on NEMIS Portal
This is a procedure to add new Form 1 students to the education system. Follow the steps below to achieve this:
1. Get their admission letters: Start by collecting their school reporting documents. These documents contain important information you will need during this procedure. You can download NEMIS admission letters for National, Extra County, and County school students from the education website.
2. Log in to the NEMIS platform: To do this, use your school UPI and password. Ensure that you have all the requirements listed above to access this system efficiently.
3. Go to the “Learner” module: As soon as you are redirected to the dashboard, you will see this option.
4. Tap “Admit/Capture request”: This option is visible from the drop-down menu.
5. Search for the student details in the system: Type in the student’s KCPE Index number or UPI number, and then tap on the search button. NEMIS will retrieve the particular student’s information and display it for you.
6. Admit the student: Tap on the “ADMIT” button to enroll the student in your institution.
How to Pay for NHIF Via Mpesa-New NHIF Paybill Via Mpesa
NEMIS Portal registration procedure
1. Login to your account using your institution’s login details.
2. Access the “Learners” module. This option will appear on the dashboard once you have logged in.
3. Click on the registration tab. Remember, you are registering a new student, not admitting them.
4. Enter the student’s details accurately. This includes their full name as it appears on their birth certificate, grade, talents, and other relevant information.
5. Attach a passport-sized photo of the student. Ensure that the picture is clear.
6. Proofread all the information entered, making sure that there are no mistakes or omissions.
7. Save the details to the system.
